Importing excel sheet to SQL Server database using SQL Server Management Studio (SQL Server Import and Export data wizard)
This article will show the steps of how to import data from an excel sheet to sql server database.
1. You first have to open your SSMS and make sure it has connected.
2. Go to your start menu, scroll down to Microsoft SQL server 2019 if you are using the 2019 version or any other version you may be using. Click on the dropdown arrow and select “SQL Server Import and Export Data” and you will see a window like the one below.

3. Click next.
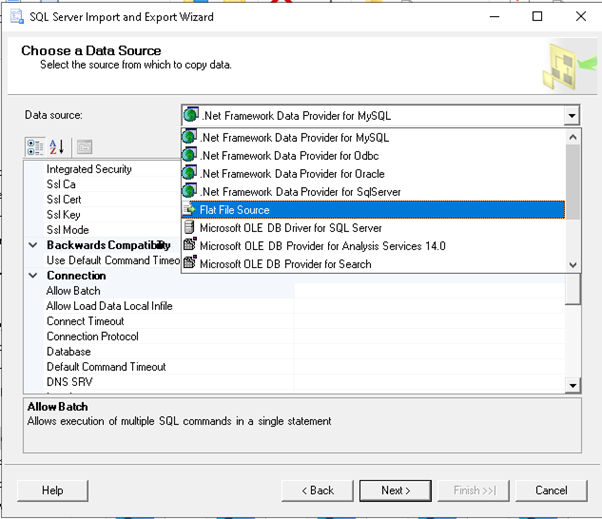
4. Choose your data source which in this case is the flat file source

5. Click browse to select your excel sheet but first change the extension of the file to “All files(*)” or “.csv” extension. The page should look as follows:

6. Click Next
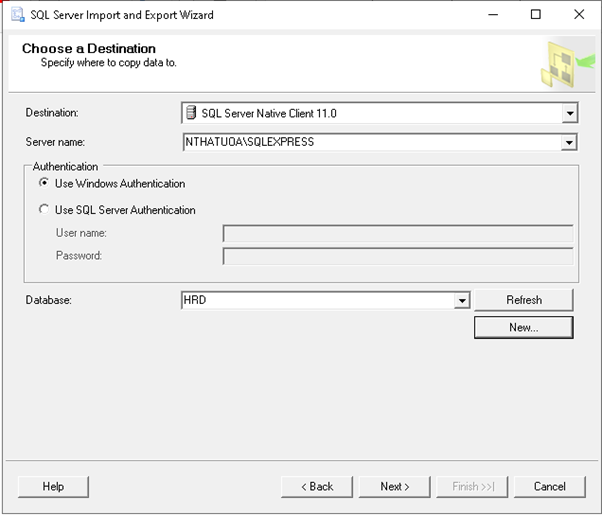
7. Choose the destination as “SqlServer Native Client 11.0”, fill your sql server database server name and choose the database where the excel sheet will be imported to. Select the appropriate authentication depending on which one your sql server database uses and fill in the username and password if it uses SQL Server authentication as shown below:

8. Click next and you should see a window like the one shown below:

9. Click next again and check the both boxes to run and save SSIS package as an SQL server database table as follows

10. Click next and fill in the correct server name

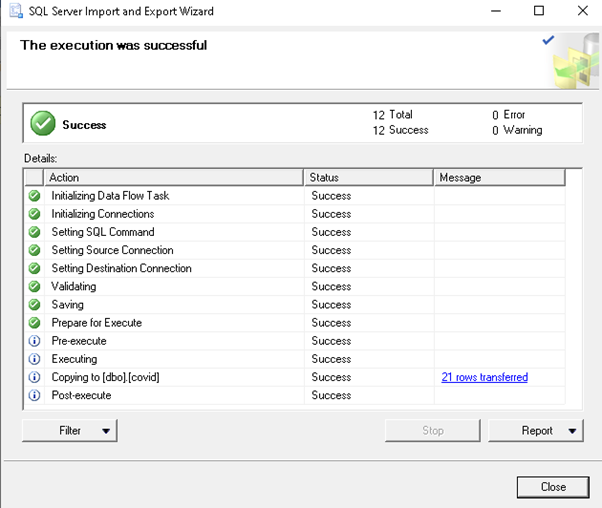
9. Click finish. If data has been successfully imported, you should be able to see a window like the one below.

10. Click close.
The chosen database will be have a table with the same name as the excel sheet and the table will be populated with the data from it.
To verify this, you can go to SSMS, select the database where the data was imported to, go to the database table, right click and select top 1000 rows to see the data in the table.


